How to split git monorepo like a boss?
Wed, Jun 9, 2021 •10 min read
Why?
Nowadays, it is hard to imagine a software development team without a Version Control System. For the past 10+ years, git has been rocking that field with its fantastic branching capabilities, allowing agile teams to benefit from the feature branch workflow. Initially, git was commonly adopted by open-source projects, but we’ve watched its rapid growth over the years in the enterprise as well.
Many companies start their technological journey from a single repository, representing a product they are launching with. Engineering is about constant evolution, and in enterprise, evolution means growth. As the product grows, so does the company. Eventually, more and more teams start to work on significantly bigger products making it reasonable to split the initial codebase into smaller units to more efficiently distribute the responsibility for certain parts of the application across different teams.
Depending on the scale of the initial project, dynamics of development, the codebase itself and the point in time when a decision to perform the split was made, the repository can already contain 10,000s of commits touching thousands of files across the project. Ideally, it’s best to keep the history clean and - most importantly - relevant on brand new repositories you are just about to set. It is not always an easy constraint to fulfill, so let me walk you through some tools and ideas that might come in handy during this process.
Sample repository
Before we begin our practice, I assume you already have a basic understanding of git. I have prepared a sample repository to be used for evaluating different strategies. Let's clone it first:
{{codeSnippet,Monorepo 123}}
The repo consists of 4 empty React applications created with create-react-app utility under ./apps directory:
-
app1
-
app2
-
app3
-
app4
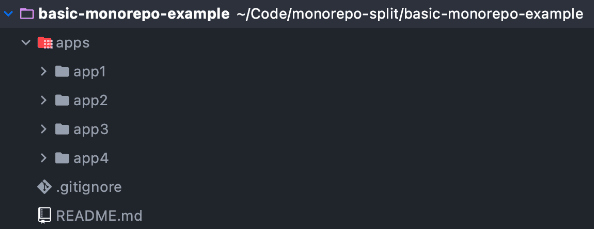
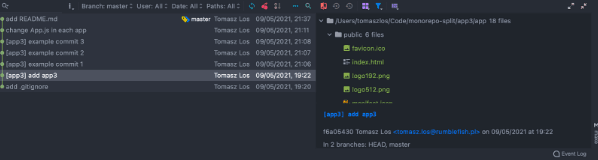
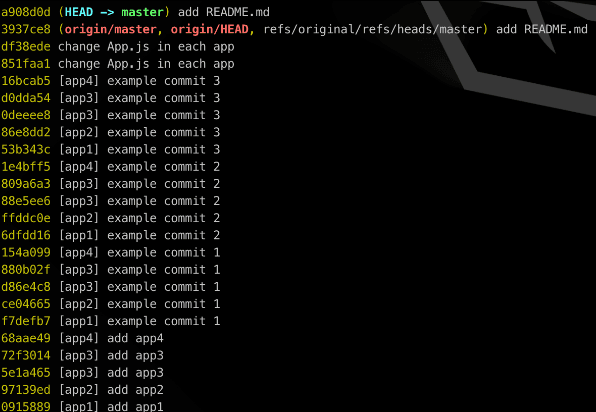
There are no modules shared between the apps, nor any configuration. It is just some standalone apps that happen to be located under the same repository. The repo's master branch has a couple of commits (19 to be precise) touching different directories around the repo. There are 4 application-specific commits in each of the apps, 1 commit adding shared .gitignore, another one adding shared README.md, and 1 commit touching files across all four apps. Later on, we will attempt to rewrite these to keep our history relevant per app. But first...
If you do not care much about the history...
... an approach I personally side with, start off with something elementary, and for those who are not very familiar with git VCS, let's consider the simplest thing we can do to split our basic-monorepo-example repo.
There are 4 apps so let's make 4 copies of the repo:
$ cp -r basic-monorepo-example app1
$ cp -r basic-monorepo-example app2
$ cp -r basic-monorepo-example app3
$ cp -r basic-monorepo-example app4
Next, we will focus on the first of the apps:
$ cd app1As this section title states - for now, we will overlook the history, so let us step out of the git world for a second by removing the git repository but keeping our source code. We will initiate a new repository as soon as we are done with all the necessary changes surrounding the project.
$ rm -rf .gitRight now, we would like to move our ./apps/app1 to ./app and get rid of the ./apps folder.
$ mv apps/app1 app
$ rm -rf apps
It looks like we are done here, so now it is time to initiate our new repo:
$ git initAs we have an empty repository, we need to add our project's files to the staging area:
$ git add -AAnd commit them:
$ git commit -m "Initial commit"Finally, we can add a remote for our repo:
$ git remote add origin new_remote_urlAs you can see, we just created a new repository from the old one. Our new repo contains a single application, README.md and .gitignore, but we also got rid of the entire history. If this is what you are looking for - repeat the above steps for the other apps, and you are done. Otherwise, let's try to perform our changes on the app2, but this time we will not remove the .git folder.
$ cd ..; cd app2Now briefly check that our history is there:
$ git log --oneline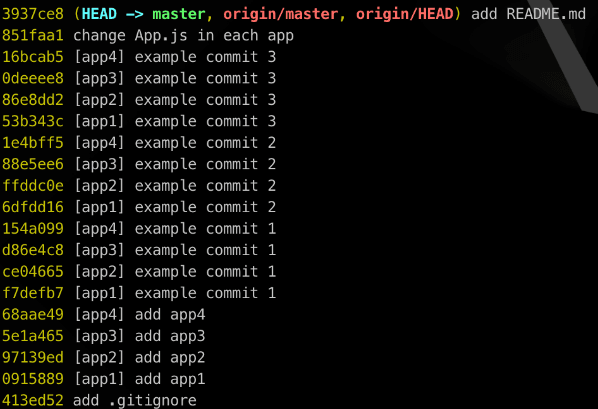
Now let's perform the similar operations as we did for app1, but using git:
{{codeSnippet,Monorepo21}}
After doing so, it is worth checking the repository status:
{{codeSnippet,Monorepo22}}
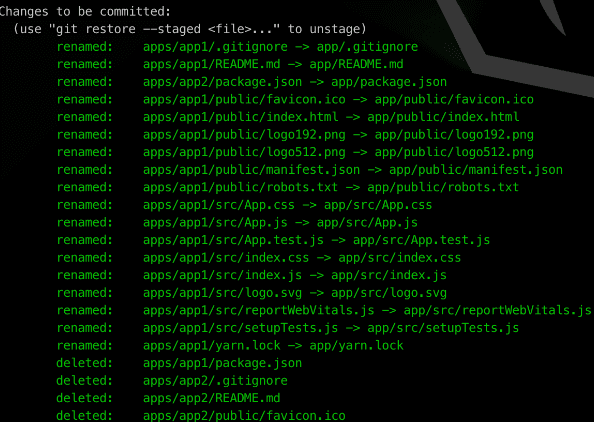
At this point, our changes are staged, but they still need to be committed.
{{codeSnippet,Monorepo23}}
If we check our repo's remotes, we still can see the old remote on the list:
{{codeSnippet,Monorepo24}}

We shall remove the current origin, and add a new one:
{{codeSnippet,Monorepo25}}
The solution we used for app2 is noticeably better than the one we used for app1, as it keeps the history, but the result is far from being perfect, as we still see all the irrelevant commits from other apps. Additionally, our changes regarding directory structure required committing, so we expanded our history rather than making it cleaner. Let's now check what we can do about it.
When you care about collaborators
I am definitely a fan of doing things thoroughly. I always anticipate that there will be a number of people working on where I left off, so it is crucial to make their life easier. Keeping the history clean and relevant is one of the things that maintainers can do to save developers some additional work, as quite often we (developers) search the history for some answers, mostly "How the hell did this get here?"...
Luckily for us, git comes with a couple of tools to rewrite history. One that you might be familiar with is git rebase with --exec param. It allows you to execute some shell commands or scripts on every commit. However, this is not quite the tool I would like to focus on now. We still have 2 applications left in our repo so let's try to achieve a cleaner history on them. This time we will use git-filter-branch.
{{codeSnippet,Monorepo26}}
According to git docs, git-filter-branch lets you rewrite the revision history applying custom filters to each commit. The tool is quite powerful, as the filters might be applied on the index, commit, message, tag name, tree and more. In our basic-monorepo-example we can leverage a --tree-filter to perform the cleanup, leaving only relevant commits in our history.
At this point it is worth to mention, that git-filter-branch upon execution displays a friendly warning:
WARNING: git-filter-branch has a glut of gotchas generating mangled history rewrites.
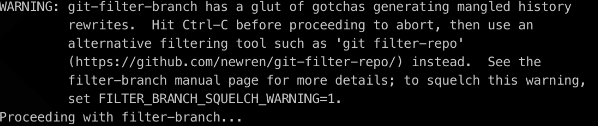
You can read more about these gotchas on the git-filter-branch official docs . For educational purposes let's ignore the warning for now.
{{codeSnippet,Monorepo 27}}
The above command applies a tree filter on every commit in our current branch's history. The filter performs git mv and git rm as we previously did. --ignore-unmatch in git rm ensures the command's exit code is always 0, so even if the directory does not exist, the command will not fail. The --prune-empty tells git-filter-branch to remove all empty commits, and our tree filter should make at least a couple of commits blank.
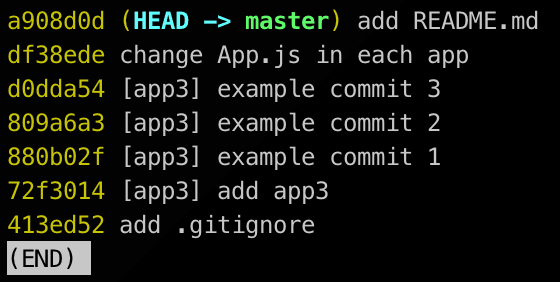
The result of executing the above command should be 7 commits left in our history - 1 commit for .gitignore, 4 application specific commits, 1 commit touching all the applications (now you can notice only the app-relevant file modified), and 1 for common README.md. Right on!
We can now remove the old origin, and add a new one:
{{codeSnippet,Monorepo28}}
However, there is one more step we need to take to consider our job done. The problem with git-filter-branch is that we cleaned our history , but deleted objects that remained in our refs (check with git log --all --oneline), as git does everything not to lose anything.
Following the official docs, we need to tell git to forget our deleted objects. We will remove refs backed up by git-filter-branch, expire the reflog and run the git garbage collector.
{{codeSnippet,Monorepo29}}
And that's it!
But what about the warning?
As mentioned before, when running git-filter-branch we get a warning about its gotchas. The very same warning brings up another tool we will try on our final application.
{{codeSnippet,Monorepo30}}
Git project now recommends using git-filter-repo instead of git-filter-branch. The only inconvenience with git-filter-repo is that it is a 3rd party Python script, and not an official git command, so it needs to be installed separately. Assuming you do have Python >= 3.5 installed on your machine you can run:
{{codeSnippet,Monorepo31}}
From now on we can use filter-repo similarly to any git command, so let's try the following:
{{codeSnippet,Monorepo32}}
As you can see, filter-repo is a bit different in terms of supplied parameters compared to filter-branch. You can still apply filters with supported callbacks (eg. blog, commit, tag), where the executed callback code is written in Python rather than shell commands. filter-repo also comes with some convenience callbacks such as filename, message and email. However, callbacks are a matter for another article, so to find out more about them please refer to the [official docs](https://github.com/newren/git-filter-repo/blob/main/Documentation/git-filter-repo.txt) for now.
The above command depends on another filter-repo convenience. --path parameter tells filter-repo what file or folder we would like to keep in our repository. Subsequent --path-rename renames (or rather moves) the kept file or directory to a new location, and finally --path-regex tells the command to keep everything but the apps directory. You are free to use multiple --path for a single run, so the above could be otherwise written as:
{{codeSnippet,Monorepo33}}
The result is similar to what we achieved with filter-branch, but filter-repo claims to be much faster (and it is actually visibly faster when working on large repos) and safer.
One more perk of using git-filter-repo instead of git-filter-branch is that after a rewrite we do not need to expire the reflog and run a garbage collector - filter-repo does that step for us. Viola!
Conclusion
My aim was to walk you through some ideas on how to perform a monorepo split. The sample repository is a very basic example of split problems you might encounter, however the actual strategy for performing a split will strongly depend on the repository's code. As with all the above operations you might do at VCS level, there is still code that would need to reflect this for example, your directory structure changes etc. I rather wanted to give you a taste of how you could approach the monorepo split, and point out that there is no one "proper" way of achieving what you're looking for. If you found the article's title a bit misleading, I still hope you learned something new, even if you’re not quite feeling like a boss and owning monorepo splits, yet. Happy DevOpsing!
Recent posts